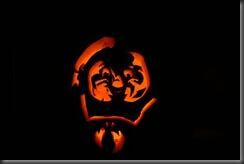
My Halloween Pumpkin Carvings
I was a pumpkin carving fool last night (as opposed to the regular fool I am all the others days of the year). While handing out candy I carved five different characters. I started off with Gelatin Skeleton, and Worm Food on the same pumpkin. I then paired up Pretty Poison and the Stay Puft Marshmallow Man. For our scarecrow I carved one of the grinning heads and used it as his head. I also had my Batman and Asylum Joker combination out on the porch as well. I even had my Mr. Incredible that I carved into the Funkin. The pumpkins looked pretty good that’s for sure.
Before the night was over we also carved Horton and Pumpkin King.
I did do a pumpkin lighting at the end of the night but of course it started raining heavily which really dampened the effect. I couldn’t get any pictures because it would have soaked my camera. We contented ourselves to simply stand there and watch. They looked good that’s for sure!
Here’s a few pictures from the night, I’ll have some in a little bit.
Other Articles of Interest:
- The Halloween Pumpkin Tally for 2010
- Halloween Night Spectacle
- The first flaming pumpkin of the year!
- Boston Can’t Handle the Flaming Pumpkin!
- We’re getting close! It’s almost time!
- Thwarted plans
- Another victory in the company pumpkin carving contest
- Halloween Death Toll – The Big Finale
- Unholy Pumpkin Trinity
- How to photograph pumpkins
How to photograph pumpkins – The artrojasdesign Way
I’ve been asked quite a few times how I take pictures of the flaming pumpkins. In actuality, it’s very simple and doesn’t require expensive cameras or tricky setups. I’ve listed the camera equipment I use and the settings. You should be able to do the same thing with your DSLR or Point and Shoot camera.
Equipment:
My camera is a Canon Rebel XTI with an 18-200mm OS lens. Any camera body and lens will work, you just need to be able to set the camera to use a long exposure; meaning you have to control the shutter speed.
The camera is mounted to a tripod. This is pretty much essential for these photos. There is no way you can hold the camera for 1/2 to 2 full seconds and expect anything more than a blur. You can get Gorilla Pods from BestBuy relatively cheap. You can also use any hard flat surface to hold the camera. Even a box will work as long as the camera doesn’t shake. I use both portrait and landscape shots when I take pictures. You may find you are using portrait the most since the flames will be pretty high and won’t show up in the shot otherwise.
A shutter release is good to have but not absolutely necessary. As long as your camera has a self-timer of 10 or 2 seconds you’re good to go.
Taking the shot:
I set my camera to ISO 100. The shots will be long exposures and I want as little noise as possible. Pick the lowest setting you have.
I put the camera in Shutter (Tv) priority. I usually start with a 1 second exposure and experiment from there. After awhile you may need to increase the exposure to capture the details.
Put the camera on the tripod or sturdy surface.
Set the timer or use the remote function so you can trigger the camera.
Line up your camera before you light the pumpkin. Use a flashlight to focus on it and get the right distance for your lens. You’ll want to be able to zoom in and out without having to get too close or adjust positions. You also want to be ready for those first few seconds, that’s when you can get some wild results.
With the camera set, light the pumpkin then move back into position quickly. Check your focus since now it should be very easy for the camera to lock in on the pumpkin.
I stand off to the side and trigger the camera. I just keep taking photos and checking my results. Try longer exposures like 2 – 5 seconds for a really "after burner" style effect. Slow speeds like 1/40 or even 1/500 will show wisps of flame that almost look like liquid.
To get the higher shutter speeds you will need to increase the ISO settings. I usually go to ISO 1600 or at least ISO 800 to get past 1/100. I usually try a couple at this speed but much prefer the 1 second exposures that you see in my pictures.
Try all sorts of different settings and check them in the preview. But take a whole bunch and see what you get!
Even if the pumpkin isn’t on fire and you use tea lights the same technique applies. Put the camera on a tripod, set a long exposure (1 sec is still a good choice) and set the timer. Check what you have and adjust accordingly.
Good Luck and have fun!!
Other Articles of Interest:
- How to photograph pumpkins
- The Dark Church
- My Halloween Pumpkin Carvings
- Halloween Experience Updated for the iPhone and iPod Touch
- 2008 Flaming Pumpkin Kickoff
- More flaming pumpkins
- Flaming Pumpkins – Iron Man and Killer Klown
- Halloween Death Toll – The Big Finale
- Halloween Night Spectacle
- This is your pumpkin, ON FIRE!!
New Flaming Pumpkins – Gargoyle and Melting Skull
As you know my pumpkin lighting attempts have been scrubbed multiple times over the past few weekends. Wind and rain have been my enemy so no flaming pumpkins for me. But last night, that all changed!
Something was off with my gasoline mixture though. It seems rain got into the works and caused my toilet paper roll to be saturated with water as well as gas. Even though it had the distinct odor of gas, it didn’t have the lightability of such. As a result, nothing happened. No whoosh. No poof. Nothing. Here I was thinking this roll which had been soaking for nearly four days was going to create a mushroom cloud and in the end I got nothing.
When faced with such a dilemma there is really only one thing to do. Yep, add more gas to the mix. I filled the bottom of the pumpkin with gas and proceeded as normal. As you might expect, I got my whoosh!
There are some great photos in this batch. I captured some really impressive fireworks in these shots.
Click here to see the full gallery
Other Articles of Interest:
- The first flaming pumpkin of the year!
- Halloween Tally
- Flaming Pumpkins – Cemetery Zombie and Morty
- Halloween Experience Updated for the iPhone and iPod Touch
- Halloween Night Spectacle
- More flaming pumpkins
- Tallahassee – A tribute to Zombieland
- Mr. Scary Pumpkin
- Save 33% to 66% at Amazon.com on "Extreme Pumpkins" series
- Flaming Pumpkins – The Grinning Jacks
The first flaming pumpkin of the year!
It’s been raining almost the entire day, but there was a break in the weather so my son and sprung into action and torched our first victim of the year! I bought a pretty heft 28 pound pumpkin when at the grocery store earlier in the day and was just itching to use him. We went with Asylum Joker, gutting and carving him as quickly as we could. We were racing against the clock and the giddiness was almost overwhelming (read sickening or perhaps even pathetic). But we diligently carved and scraped and brought to bear the first victim of the year. I have to say he looked pretty good.
Since it was a special occasion I loaded him up with two rolls of TP just so he would have plenty of firepower and could fend off the rain. I may placed a touch more accelerant into the pumpkin just for good measure.
He went off like a shot! He burst into action and almost instantly he was a flaming inferno! He lasted a good 45 minutes from start to finish and I got some great shots. I even played around with taking pictures of just the flames which look almost liquid.
Just as the flames started to die down the rain started. We had planned ahead and were standing under a large umbrella, but it was time to make a dash and get everything back inside.
Here is the Joker in all his flaming glory. Click the image or the link below to see the full gallery of images.
Click here for full Flaming Pumpkin Gallery
It was a damn good test and make no mistake, next weekend another one will become a flaming sacrifice.
Other Articles of Interest:
- Tallahassee – A tribute to Zombieland
- New Flaming Pumpkins – Gargoyle and Melting Skull
- Halloween Death Toll – The Big Finale
- This is your pumpkin, ON FIRE!!
- My Halloween Pumpkin Carvings
- More flaming pumpkins
- How to photograph pumpkins – The artrojasdesign Way
- My Favorite Pumpkin
- The Halloween Pumpkin Tally for 2010
- Flaming Pumpkins – Old Hag and El Chupacabra


Recent Comments